I’ve always wanted my online gallery export script to handle videos and last weekend, I bit the bullet and wrote it. I used quite a few Open source projects to accomplish this which means that PEAExport has a few dependencies but I think it’s worth it. My Canon Ixus takes AVI movies. The sizes of the movies range from 1MB to 50MB. To upload these would just be silly and each viewer would have to have an AVI viewer, which probably wouldn’t load in the browser. I really like flash movies players like those found on YouTube and Google Video so I anted to find a free one to use, I found the wonderful flvplayer @ http://www.jeroenwijering.com/. It’s an excellent player and free for non-commercial use.
So at this stage, I have my Videos in AVI format and a flash video (flv) player. I need to transcode them from AVI to FLV to work with the player. In work a few weeks ago we came across the SUPER application. This is a GUI front end to FFMPEG which is an absolutely wonderful utility, It handles tens of formats and hundreds of options. I used the FFMPEG.exe bundled with SUPER to tanscode them from AVI to FLV
ffmpeg.exe -i 'video.avi' -y -ab 64 -ar 22050 -b 200 -r 25 -s 650*450 'video.flv'
The options above (full list of options):
- -i ‘video.avi’= input file is video.avi
- -y = overwrite existing file if it exists
- -ab 64 = audio bitrate is 64 kbit/s
- -ar 22050 = audio sampling rate is 22050 Hz
- -b 200 = video bitrate is 200 kbit/s
- -r 25 = frame rate is 25Hz
- -s 650*450 = rame size is 650 pixels by 450 pixels (WxH)
- ‘video.flv’ = output file
Running this converts the hefty AVI video to a lightweight (relatively) FLV video. I then need to get the flvplayer playing this newly generated FLV.
<object data=”flvplayer.swf” type=”application/x-shockwave-flash”>
<param value=”file=video.flv&image=medium.jpg&linkfromdisplay=true&link=../14″ name=”flashvars” />
<param name=”movie” value=”flvplayer.swf?file=video.flv&image=medium.jpg&linkfromdisplay=true&link=../14″ />
</object>
There are many options for the flvplayer (full list of options). I only needed a few –
- file=video.flv = input file is video.flv
- image=medium.jpg = the loading image before you press play is medium.jpg
- linkfromdisplay=true = when the user clicks directly on the movie area then they will be redirected to another page
- link=../14 = when they click on the video, they will be redirected to the relative link “../14”
This plays fine but the progressbar isn’t running, This is a known limitation of FFMPEG (it’s fixed in the SVN version), FFMPEG does not write the metadata like video length etc to the FLV file. To do this, I was able to use another free utility called FLVMDI
flvdmi.exe video.flv video.flv
Running this inserts all the required metadata into the FLV video. The progress Bar now works perfectly.
You’ll notice that in the options for the flvplayer, I included “image=medium.jpg”. I could have used any image here but I wanted to use a frame from the video. Fortunately FFMPEG can do this.
ffmpeg.exe -i 'video.avi' -y -vcodec png -vframes 1 -an -f rawvideo -s 650x450 'videoimage.png'
The options above (full list of options):
- -i ‘video.avi’= input file is video.avi
- -y = overwrite existing file if it exists
- -vcodec png = force video codec to png
- -vframes 1 = set the number of video frames to one
- -an = disable audio
- -f rawvideo = force format to rawvideo
- -s 650*450 = frame size is 650 pixels by 450 pixels (WxH)
- ‘videoimage.png’ = output file
This results in a PNG file, quite a big one, taken from the first frame of the video. The file was too big for web use so I needed to convert it to JPEG. I could have used the Python image library PIL to do this (PEAExport already uses PIL) but I was already using some command utilities utilites to create videos and images. I thought, there’s no harm in another. That other was Convert.exe from the ImageMagick Library.
convert.exe -quality 75 videoimage.png videoimage.jpg
The options above (full list of options):
- -quality 75 = compression level set to 75%
- videoimage.png = videoimage.png is the input file
- videoimage.jpg = videoimage.jpg is the output file
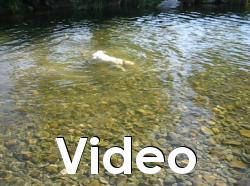
Excellent, I now have a lightweight flv video but I want a thumbnail to display in my gallery index pages. I ran the FFMPEG fram grap command but with “-s 250×186” to reduce the size to thumbnail size. I also want to indicate that it’s a video that the users is going to see and not another photo. So I need to Annotate it with the word “Video”
convert.exe -quality 75 -gravity South -font C:WINDOWSFontsGOTHICB.TTF -pointsize 50 -fill black -annotate +1+1 Video -fill white -annotate +0+0 Video videoimage.png videoimage.jpg
The options above (full list of options):
- -quality 75 = compression level set to 75%
- -gravity South = direction primitive gravitates to when annotating the image – In this case, we want the annotation loacted in the South of the image
- -font C:\\WINDOWS\\Fonts\\GOTHICB.TTF = The font for the annotation. In this case I am using Century Gothic Bold
- -pointsize 50 = The font size is set to 50 points
- -fill black = The fill of the annotation is to be black
- -annotate +1+1 Video = Annotate the word “Video” plus one pixel in both directions from the base position of “South”
- -fill white = The fill of the next annotation is to be white
- -annotate +0+0 Video = Annotate the word “Video” plus zero pixels in both directions from the base position of “South”
- videoimage.png = videoimage.png is the input file
- videoimage.jpg = videoimage.jpg is the output file
This creates a thumbnail image with the word “Video” in white with a black drop shadow, in Century Gothic Bold font, size 50 points.

And that my friends is it. Enjoy all my vidoes @ http://www.halfviking.com. I have also created a new page @ http://www.halfviking.com/videos using flvplayer’s playlist feature. My favourite single video is Bobby very bemused as to what on earth is planted in the ground at Crosby beach north of Liverpool.


